Please enable Javascript for better experience...
 
vSphere 6.5 - How to Create New Virtual Machine
By Pranay Jha | May 29, 2017 | In Articles | Total Views [ 33406 ]
Taged In
(6 Like)
Rate

So once again we are here for another topic on Deploying a New Virtual Machine. Before explaining in further articles about virtual machine, let's have some quick steps how we create a new Virtual Machine in vSphere 6.5. Usually we call it a VM or Guest Machine.

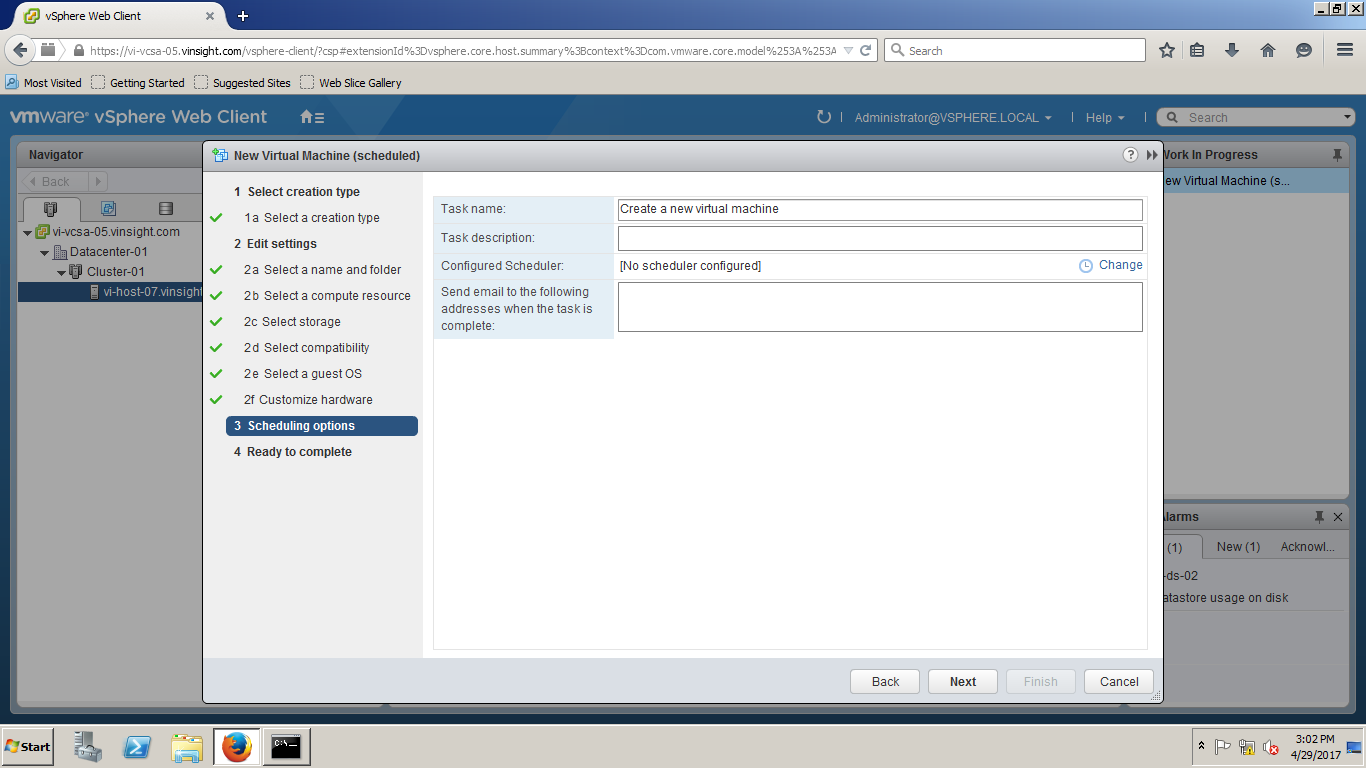
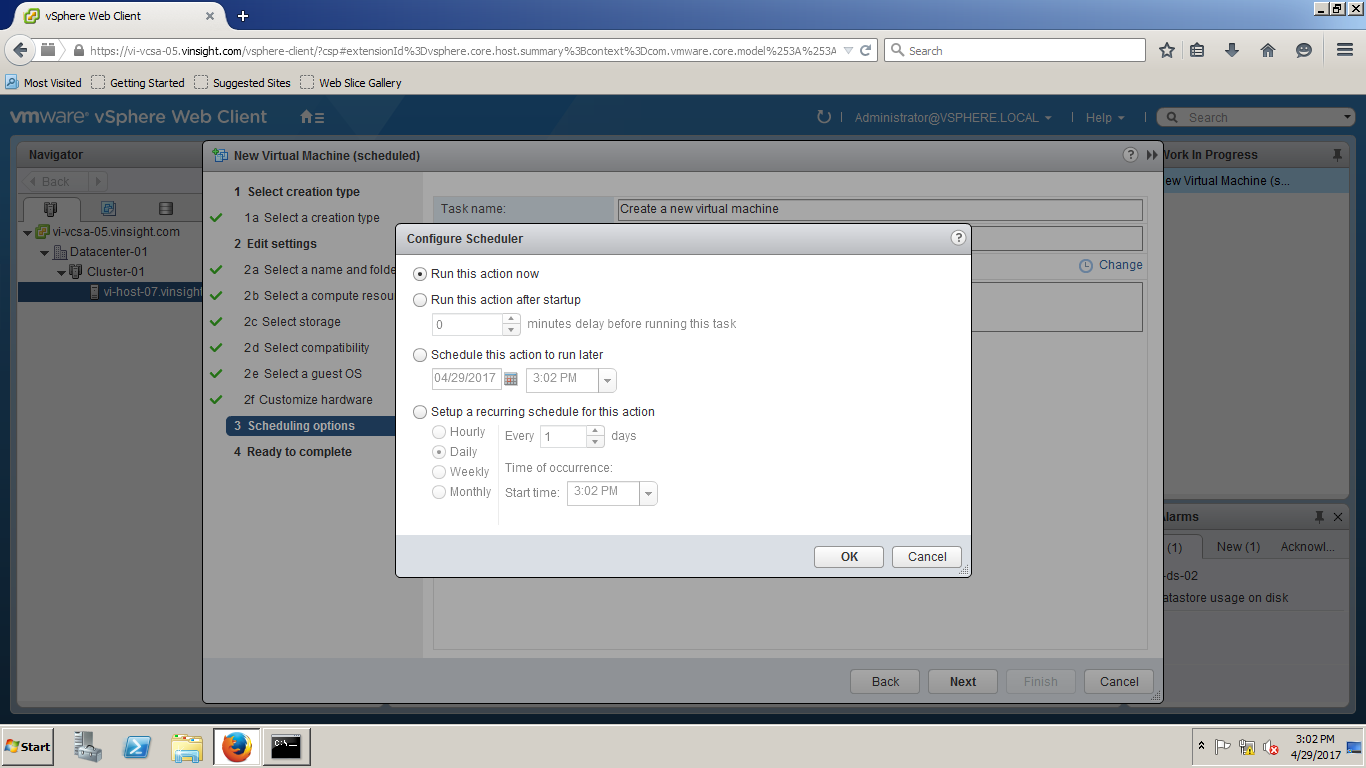
I understand that it's an easy process for most of you to create a VM, but still for beginners it can be usefull. And also there are few changes while creating VM that VMware made in vSphere 6.5 that I would like to highlight here. Options, like Task Scheduler for VM Deployment.

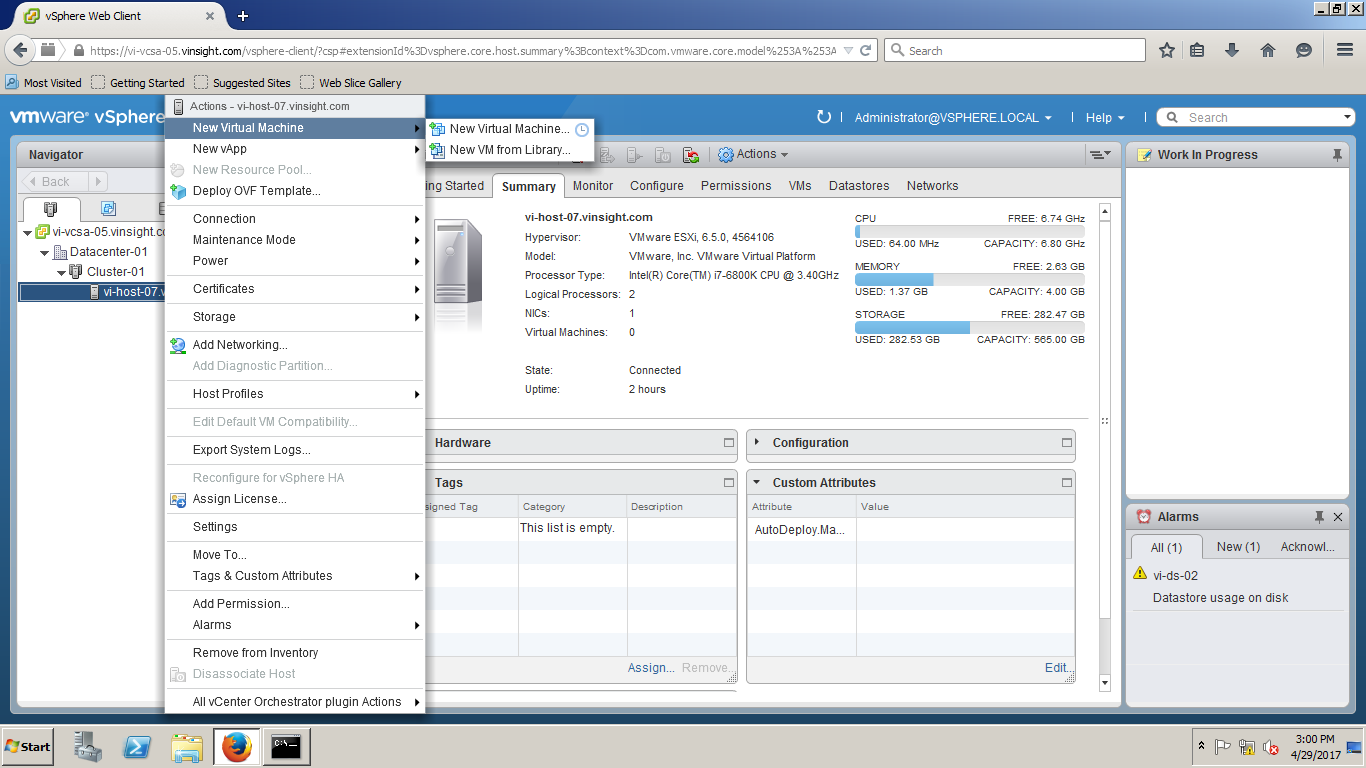
There are many options listed below to Deploy a Virtual Machine in your vSphere Environment.

  • Create a Virtual Machine from Scratch without Template (We will cover in this topic)
  • Deploy a Virtual Machine from Template
  • Clone a Virtual Machine
  • Convert a Template to Virtual Machine.
  • Deploy a Virtual Machines through OVF

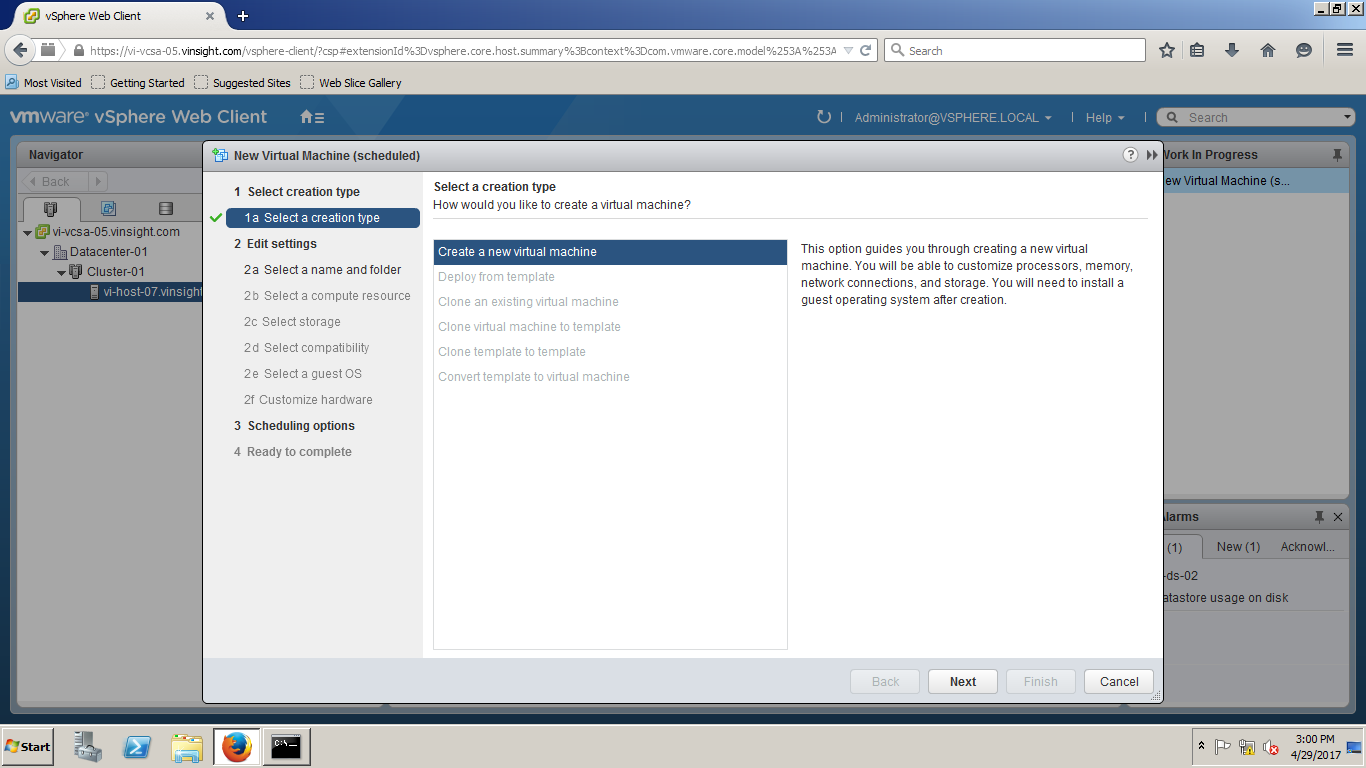
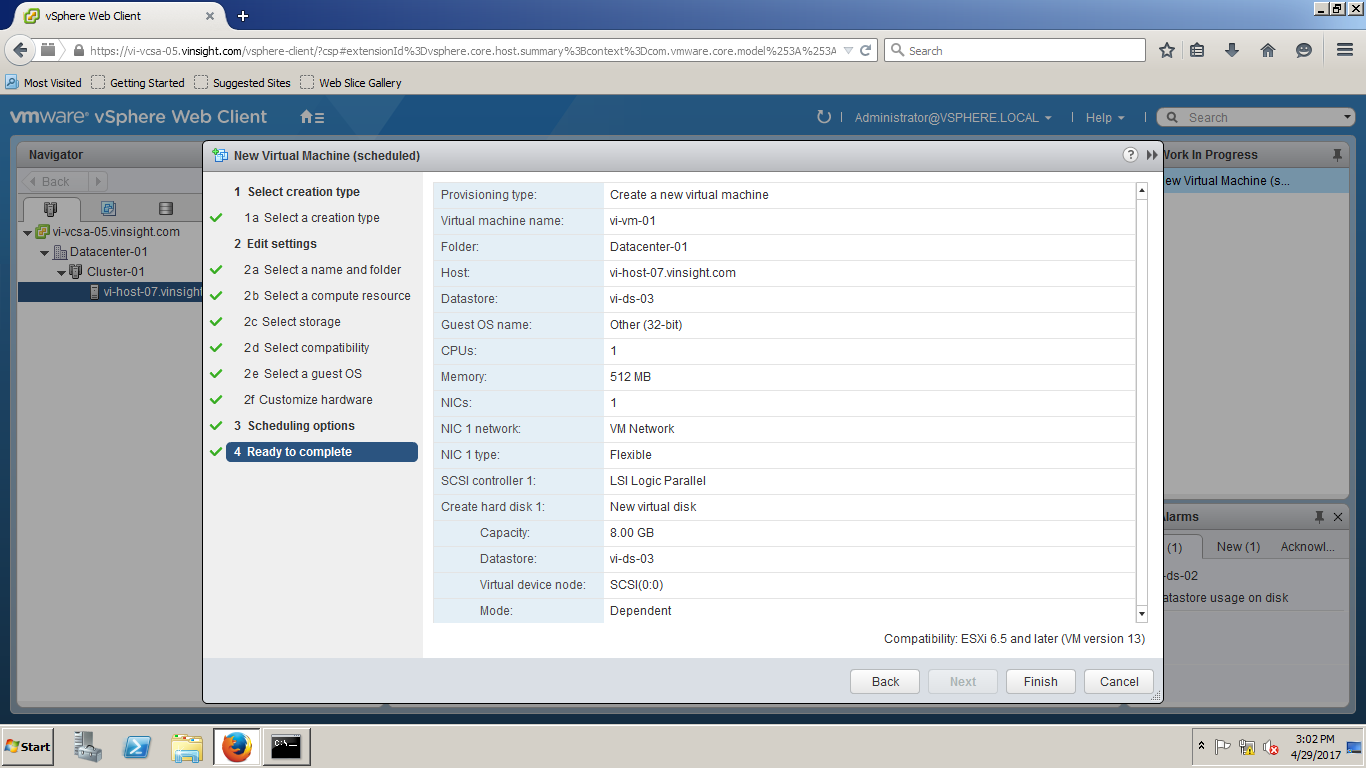
Here in this article we are going to cover point 1 to Create a Virtual Machine from Scratch even if we do not have any existing VM or Template in our environment.

Pre-requisites:-

Before proceeding to deploy a Virtual Machine, a question may arise in your mind if you are new to this that what is pre-requisties to deploy a Virtual Machine.

Let me tell you that here we are explaing about vSphere environment, hence we need Hypervisor as ESXi on which we will create Virtual Machine. Hypervisor is base of any Virtualization platform.

From Management purpose, we either need Virtual Center and vSphere Client to access it, or can directly deploy through accessing ESXi Console through VI Client.

Further to that, we required below priviledges:-

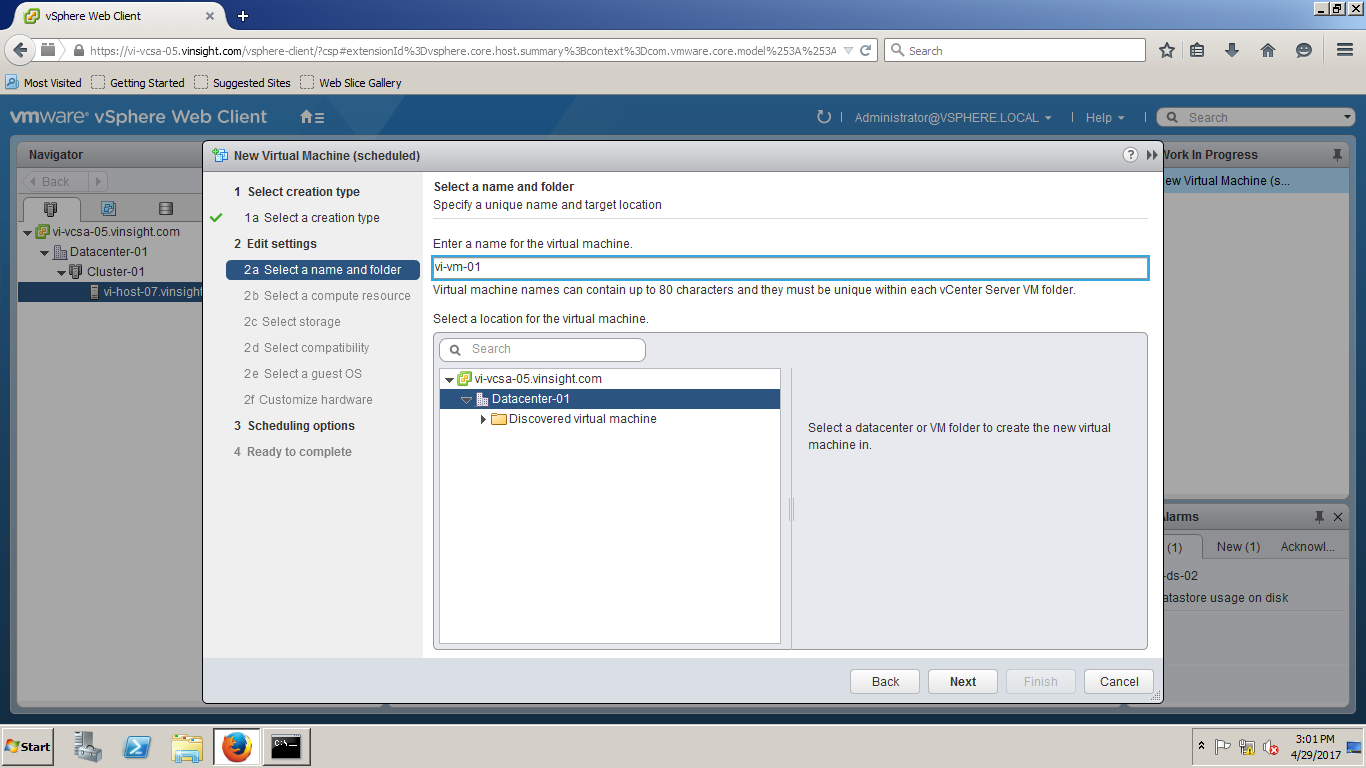
Virtual machine .Inventory.Create new - on the destination folder or datacenter.
Virtual machine.Configuration.Add new disk - on the destination folder or datacenter, if you are adding a new disk.
Virtual machine.Configuration.Add existing disk - on the destination folder or datacenter, if you are adding an existing disk.
Virtual machine.Configuration.Raw device - on the destination folder or datacenter, if you are using a RDM or SCSI pass-through device.
Virtual machine.Configuration.Host USB device - on the destination folder or datacenter, if you are attaching a virtual USB device backed by a host USB device.
Virtual machine.Configuration.Advanced - on the destination folder or datacenter, if you are configuring advanced virtual machine settings.
Virtual machine.Configuration.Swapfile placement - on the destination folder or datacenter, if you are configuring swapfile placement.
Virtual machine.Configuration.Disk change tracking - on the destination folder or datacenter, if you are enabling change tracking on the virtual machine's disks.
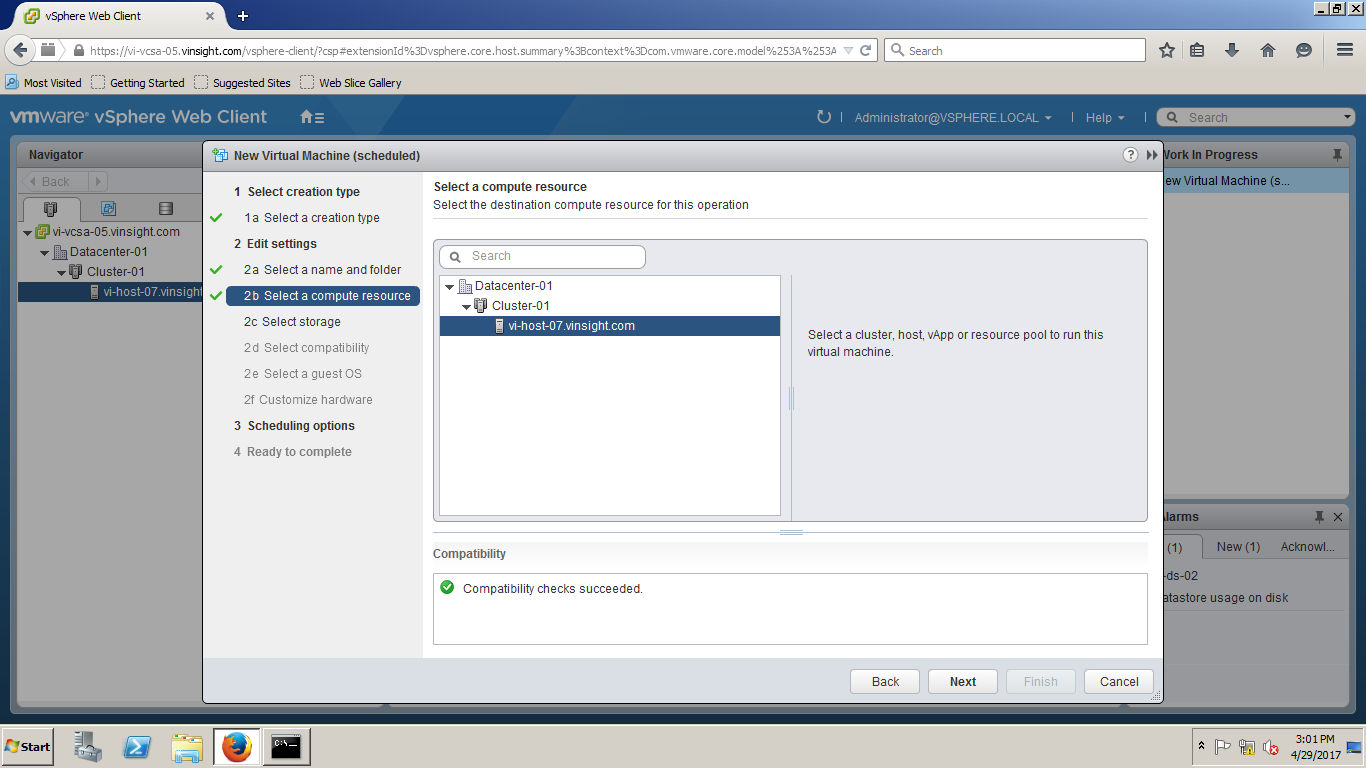
Resource.Assign virtual machine to resource pool - on the destination host, cluster, or resource pool.
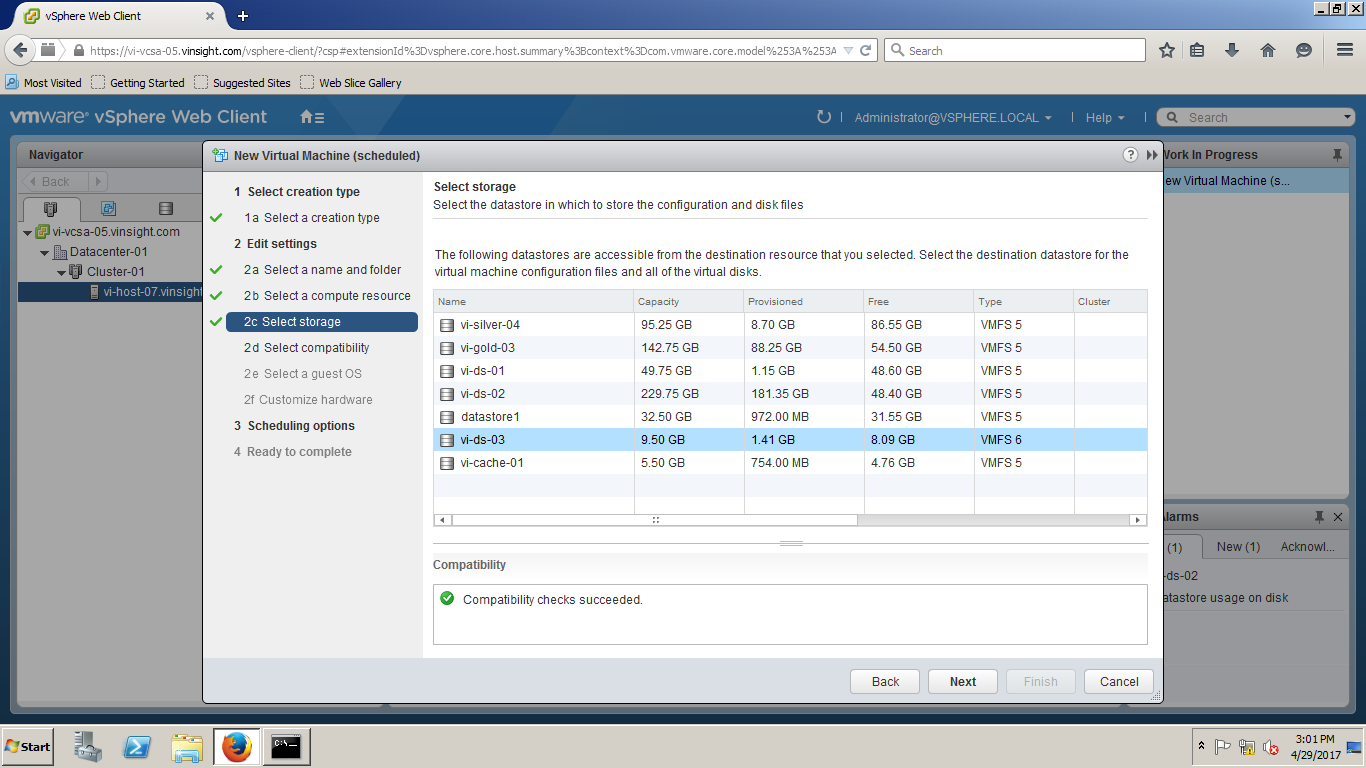
Datastore.Allocate space - on the destination datastore or datastore folder.
Network.Assign network - on the network that the virtual machine will be assigned to.

In nutshell;

  • We need to have a ESXi Host.
  • Access ESXi through vCenter console or direct VI client.
  • Deploy Virtual Machine following below steps.

Step by Step Procedure to Deploy a Virtual Machine

  • Login to Virtual Center using Web Client or vSphere Client.
  • Select ESXi Host and do a Right Click.
  • Click on New Virtual Machine. It will open New Virtual Machine Wizard.

  • From Select a Create Type, Choose "Create a new virtual machine" and Click on Next.

  • Enter a unique name for the Virtual Machine and Select either Datacenter or Specific Folder you want to deploy this VM. The name can contain up to 80 characters. Click on Next.

  • Select Cluster and ESXi host where you will deploy this Virtual Machine. Virtual machine will have access to the resources of the selected object.(i;e Datastore and Network attached to that Cluster/Hosts).

  • Select Datastore in which you would like to store the Virtual Machine configuration files and all of the virtual disks. Please note that Virtual disks and configuration files can also be in different datastores. Click on Next.

  • Select Compatibility for this Virtual Machne. Choose default and Click on Next.

  • On Select a Guest OS Wizard, Choose the Guest OS type(i;e Windows/Linux/Other, 32/64 Bit) and Guest Name. Please note that selecting Guest OS Type affects the supported devices and number of virtual CPUs available for the virtual machine. i;e i fwe choosed 32 Bit Windows OS, then even if vSphere 6.5 support 128 vCPU, but this VM will only support up to vCPU depending on OS compatibility.

  • Configure the Virtual Machine Hardware as per requirement and Click on Next.

  • Select Scheduling Option for this Virtual Machine.

  • You change Virtual Machine Scheduling to some different time. To do this, Click on Change and setup scheduling.

  • If you want to deploy now, Click on Next.

  • You can review the virtual machine before you deploy the virtual machine. Click on Finish to Complete the New Virtual Machine Wizard.

  • A new Virtual Machine has been deployed in ESXi Host. You can Click on Summary Page and reivew the configuration and status.
  • Please note that Creating Virtual Machine Wizard only provision a New Virtual Machine in Environment. It doesn't install Operating System. To Install OS, follow the below Process:-
    • Right Click on Virtual Machine.
    • Go to Edit Settings.
    • Mount ISO for specific OS.
    • Power On Virtual Machine and follow Installation Wizard.


Thanks for visiting here. Share this article if you found it useful.
Like Facebook Page https://www.facebook.com/VMwareInsight/
Connect to twitter https://twitter.com/imPranayK
Subscribe my Channel https://www.youtube.com/vmwareinsight
Connect over Linkedin https://in.linkedin.com/in/impranayk
Share this on Social Media

About the Author

Pranay Jha
Pranay Jha
Founder, Contributer VMwareInsight.com

Public profile: user/profile/99900000


Follow me

facebook linkedin twitter G+ VMTN youtube

Thank you for visiting my profile. I am Pranay Jha, bring along a total of 11+ years of extensive experience with me in Information Technology sector for organizations from small business to large enterprises, wherein my current assignment I am associated with IBM as a Technical Solution Architect for Virtualization platform. I am vExpert x 3 (16/17/18), VCIX-DCV, VCAP5/6-DCD, VCAP5-DCA, VCP7-CMA, VCP5/6-DCV, VCA-DCV, VCA-Cloud, VSP, VCE-CIA, MCITP, MCSE, MCSA(Messaging). I am also an Independent blogger and founder of http://vmwareinsight.com and https://cloudpathshala.com. I can be reached via email at pranay1988jha@gmail.com or Direct Message via Contact Us form.

 
Please SignUp/Login to comment...

Or comment as anonymous...
* Name
* Email ID
Comment
 
Sponsors


Facebook Likes